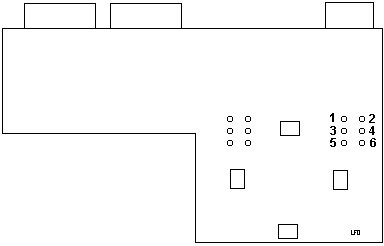
Operator Panel
General Description
Pinout for Op Panel Connector
Register Information
LED Module HDLG-4216 Information
Cheap Op Panel Lens Redo
Thoughts on Adding a HD LED
Peter's Two-Color LED
Works on early non-shuttered switch only.
Shorney's Shortcut
Origin of Op Panel Board
Button Sizes
Power Switch Shutter
Testing Power Switch
Replacement Power Switch
Odd LED Behavior
LED Panel Driver Programs
General Description
System board provides a 2-by-17-pin Berg connector to
the operator panel. The operator panel consists of the ON/OFF switch, a
speaker, a fixed-disk access light, a power-good light, and an information
panel.
It displays eight characters using 5-by-7 dot LED displays.
The information panel is accessed through an 8-bit data bus, which is controlled
through a set of I/O ports
Operator Panel Registers
(Hex 0108-010F) for more information).
HDLG-4216LED Display
(pdf
data sheet)
Smart Alphanumeric Display Built-in RAM, ASCII Decoder,
and LED Drive Circuitry Software Controlled Dimming Levels and Blank 128
ASCII Character Set.
Now this is where I went to work. Imagine what if you took
the codes that are output to the parallel port and hooked them into the
HDLG-4216? We would need a hex to ASCII converter to feed the HDLG, but
with the capabilities and features afforded by the 4216, why not take the
time?
Cheap Op Panel
Lens Redo
From Tony Ingenoso
Tired of the scuffed up scratched LED display panel on
your M95? Would you like it to look as if it were new again?
Here's how -- it takes about 1 minute and makes all the difference in the
world from an esthetic point of view.
1) Remove the bezel containing the LED panel cover.
2) Pop the scratched up plastic cover off.
3) Look at the locking tabs on the sides - one is a tad wider than
the other.
4) Using an X-acto, benchtop belt sander, whatever... make the long
tab the same depth as the short one.
5) Reinstall modified LED cover with the scratched side facing inwards.
6) Voila - now your LED panel looks like new and doesn't have any unsightly
scuffs or scratches on it.
Thoughts on Adding
a HD LED
>I am thinking of using 2 colored LED, and replace the power on LED.
From Peter
Err ... that won't work that easy - you will have to rework
the thing a bit more. The Power LED has +5V as common and GND over resistor,
while the HD-Led signal supplies +5V activity signal and common GND ...
except you have a LED with 4 wires (2 separated LEDs in one unit).
From Jim Shorney
And I found this out, too. Although the idea is still kicking around
in the back of my mind, behind some other distractions from down south...
It should certianly be possible to wire in a simple switching
circuit with an NPN transistor on the HD LED to take care of the difference
and allow use of a common-anode bicolor LED, providing the +5 can source
a few extra milliamps. I haven't figured out (yet) if this comes
from hard power or is a signal output from the PS/planar. The other
possibility is to use a common-cathode LED and share the resistor for the
power LED, but I'm not sure how well this would work. LED's are diodes,
after all, so the two sources would be isolated from each other (in theory),
but I'm not sure what this would do to the brightness of the LED's.
I may play around with these ideas in the future, but I wanted to keep
the initial mod as simple as possible for those who might be comfortable
with a soldering iron but don't possess sufficient knowledge to handle
wiring up transistors and such.
From Peter
About the HD-bicolor LED: I still think it is no
good idea. The difference in the color change is ... well ... hard to see
while the green power part is permanently on. This could work however if
you have a "common cathode" LED and replace the resistor on the printboard
with a small 2-transistor 10mA constant current circuit. In this case the
pin 4 (HD-LED) could be fed directly to the anode of the red LED part and
the +5VDC (Power) to the green LED part and the two LEDs share the common
GND and the current limiter.
*But* the visibility is still bad. What you need
were a "NAND" function that switches off the green power LED when the red
HD LED comes on ... that would make the color either green *or* red but
not a diffuse orange when both come on.
To simplify the circuit: you only need to check
the HD signal. As long as it is low the green LED part is on (if there
were no power it were dark anyway) and once the HD signal pin comes "high"
the red LED comes on and the green is switched off ... In this case you
could even use a "common cathode" bi-color LED, which are more familar
than "common anode" types IIRC and keep the existing current limiting resistor
on the printboard.
Still too complicated I think. Faster
and -to my opinion- better results are obtained with installing a bright
red LED behind the LED "window" ...
From Peter
>I thought of that as well. But, as you say, it
it starting to get complicated. I'm perfectly capable of whipping
somethign like that up, but not sure that I want to go to the trouble.
I'm trying to stick to something that just about anyone can whip up.
Currently I have broken down the "logic" to
2 additional resistors and a PNP-transistor :-) I'll try out if that works
on Thursday maybe and let you know ... I only need to buy a two-color LED.
My first "experimental assembly" will most likely consist out of two standard-LEDs.
>An LED behind the display window seems to be the best
overall solution.
Yep. The current "implementation" looks pretty cool. I
really wonder why the heck IBM did not include a standard HD-LED
in their darn expensive flagship at that time. I think it might be a reason
that they "recycled" an existing panel-unit from a mainframe controller
- and that simply had no HD ...
>One of the triangular ones used in tuning indicators
and tape player directional indicators might look cool.
It sure does - but the rectangular types can be easily
fixed with some superglue on one of the existing LED arrays. Whatever -
it is possible to integrate a LED without damaging the panel bezel ...
and that counts :-)
>I think I would go with green, myself. And I'm
still thinking about replaceing the power LED with a blue one...
Matter of personal taste ... and I recently found some
"blue LEDs" which are pretty cheap ... and no LEDs at all. They are small
lamps (bulbs) with a blue-colored glass. I think VW used them in earlier
years for the "hi-beam" indicator lamp in their cars. They *look* like
LEDs - even have the flattened side - but unlike to LEDs they work in either
polarity. :-)
Peter's Two Color HD LED
Peter's minimalistic "Two-Color LED" Solution
+-----+-------o HD (Pin 4)
| |
Op-Panel Cable
+++ |
47K |
| | |
| | |
+++ |
| |
| B |
+--+--+ |
E | 2SA | |
o------+ 608 | |
+5VDC |(PNP)| |
from existing +--+--+
|
LED C | |
o o
| |
Green \T/ \T/ Red LED
LED --- ---
| |
+-----+
o
|
+++
330R | |
existing resistor
| |
on card panel
+++
|
o---------+ GND
------------------------------------------------------------
* Principle of Operation *
You need to unsolder the existing green LED. The +5VDC
contact needs to be fed to the above circuit. Only the common cathode of
the bi-color LED gets soldered back in the place where the original LED
cathode was.
The two LED-parts use the existing 330
Ohms resistor in common. The PNP transistor gets minus-potential over the
47K resistor and the green LED lights up. Even when the HD-pin does not
feed minus to the resistor (tri-states) the GND connection is given over
the red LED part and the current-limiting resistor, so that the green LED
will light under any circumstance.
Once the HD-pin gets positive (on HD
operation) the positive +5V pulse will turn Base of the transistor positive
and the green LED goes blank - the red LED is then on and indicates HD
activity.
The type of the PNP-transistor is uncritical. Any
type will do. I used this 2SA608 while I had it ... In case you want to
return to original condition you only need to remove the circuitry and
resolder the single green LED. Pretty easy, eh ?
------------------------------------------------------------
(C) 1999 by Peter H. Wendt (peterwendt@aol.com)
------------------------------------------------------------
I found out that my original concept works only with *one* panel card,
which sits in a very early Mod. 8595-AH9 (without shutter). All my machines
have the same panel card that Jim described and to which he pulished a
"revised version" of my PNP-transistor solution. The two cards only differ
through the position of the current-limiting resistor for the "power LED"
- but that makes
a bit difference. Sigh.
Shorney's Shortcut
Parts required:
An LED of the size, shape, and color desired
One .25 Watt, 330 Ohm resistor
Two short lenghts of small-guage hookup wire
Some small heat-shrink tubing
An IBM Model 95
Tools required:
Soldering iron
Wire strippers/cutters
Intructions:
1. Trim the leads of the resistor and the anode lead (the long leg)
of the LED short, and solder one lead of the resistor to the anode of the
LED.
2. Solder the two lengths of hookup wire to the other resistor lead
and the cathode (short leg) of the LED.
3. Cover the soldered connections with the heat-shrink tubing and, well,
"heat shrink" it.
4. Pull your 95 apart, and unplug and remove the operator panel display
PCB (you do know how to do this, right?).
5. Secure the LED in your desired mounting location (more on this in
a bit) and cut and strip the two free wire ends to length; the anode lead
(the one coming from the resistor) will be soldered to pin 4 of the ribbon
cable connector, and the cathode lead will be soldered to the frontmost
of the two speaker connector pins (ground). Make your connections
on the bottom of the PCB.
6. That's it! Install the PCB back in your model 95, taking care
not to snag your wires as you slide the PCB back in. Enjoy your hard
disk light!
Now, as to mounting location for the LED... Being into vintange ham
radio gear, I subscribe to the "drill no holes" school of mods. Finding
a suitable location for the LED, without altering or detracting from the
aesthetics of the machine, is the hardest part of this adventure.
My first experiment was to tie the new (red) LED to the existing power
LED with a cable tie, so they are side-by-side. This results in an
interesting green-to-red/green effect when disk access occurs that can
be varied by adjusting the positioning of the LED's behind the bezel, but
the result is not easily discernable from a distance or over a very wide
viewing angle. Another thought that occurs it to somehow fix a square
or rectangular (or some other interesting shape) green LED
behind the operator panel window, either dead center above or below
the operator display, or in one of the corners. I may experiment
along those lines when I get my hands on some LED's that are other than
round.
While I'm at it, I may just replace the power LED with
one of these blue LED's that I have around here. Seems apropriate...
This info will appear on my web site. Someday.
Subject: Peter's LED circuit
Author: Jim Shorney <jshorney@inebraska.com>
I finally got around to trying Peter's nifty circuit for
a two-color HDD LED in a model 95. In the process, I discovered that
there are at least two varaitions of the info panel PCB. Mine differs
from Peter's in the location of the LED resistor, so I had to change the
circuit as shown below:
___________________________________________________.
.
.
+-----+------o HD (Pin 4) .
| |
Op-Panel .
+++ |
Cable .
47K | | +++
.
| | | | added
.
+++ | | 330R
.
330R
| B +++
.
on panel card +--+--+ |
.
+----+ E | 2SA
| |
.
o--+ +--o----+ 608 | |
.
+5 +----+ |(PNP)|
|
.
from existing +--+--+ |
.
LED
C | |
.
o o
.
| |
.
Green \T/ \T/ Red
.
LED --- --- LED
.
| |
.
+-----+
.
|
.
o power LED cathode pad .
|
.
|
.
|
.
|
.
|
.
|
.
|
.
o---------+
GND
.
- ---------------------------------------------------
Circuit function is essentially the same, the change was
required because my board has the 330 ohm on the anode of the power LED
instead of the cathode, as shown in Peter's diagram. The green LED
does not fully extinguish in this configuration because the HD output only
seems to source about 3.6 volts under load, but it is dim enough that the
red is clearly visible from an angle or a distance of a couple of feet
(meters?).
That having been said, I also tried a rectangular red
LED behind the display panel on another 95. I must say, I like the
way it looks. I fixed it with hot glue to the bottom of the rightmost
operator display LED so it appears directly below the rightmost character
of the display. Now I need to decide which way I like better....
Origin of Op Panel Board
>BTW. what is the switch 1 for on the control panel PCB ???
Artifact. Irgnore it. The panel came originally
from a 3270 control-unit and the second switch was used to set the IPL-mode
of the box.
Button Sizes
The button size between "lefthand" and "righthand" panels
is different - respectively the *length* of the buttons. Ed.
Ran into this when I swapped a button from the 8595 onto. the 9585.
Power Switch
Shutter
The protective shutter over the power switch is missing
on early, first series 8595 models only, it came standard in early 1992.
Test Switch Function
 Rick
Starich made me! Rick
Starich made me!
Pull Op Panel out front of system. Leave PSU plugged in.
Short 3-6 OR 5-4 and system should power up
if Op Panel board and cable are good. Nothing will happen if 5-6 or 3-4
are shorted .
Replacement Power
Switch
If you can, unsolder the other switch on op panels with
two switches. Same type of switch. I used a GC 35-491 (Push On DPDT Power
Pushbutton Switch) and it fit perfectly. Pull off the round button and
pop the original rectangular button on. Fits perfectly.
I had a 9585 that would not turn off reliably. You could
push the switch up to five (or more!) times before it would turn off. I
tried slowly wiggling the switch and the 85 would come up...
LED Panel Odd Behavior
From Alfred Arnold
Last week, I was able to get my hands on a 8595-AKF (Type
1 complex, 486DX33, no cache module :-( ). The price was on a per-kilogram
basis, so I was quite happy. However, when installing Linux and my
own tool to display some system statistics on the LED display, I noticed
a strange behaviour I hadn't seen before on a 9595 with a P60 complex:
Even under Linux, there seems to be some type of 'demon' that regularly
clears the right half of the display. I also saw this under plain
DOS, but I thought first this were a 'feature' of the BIOS.
However, since this also happens under Linux, either something on the planar
is slightly broken, or there are some implicit links between the LED display
and other parts of the planar's hardware I'm not aware of. I don't
hope it's the first case ;-)
From Peter
>Even under Linux, there seems to be some type of 'demon'
that regularly clears the right half of the display.
On the -AKF this is surely a bug rather than a feature.
The LED-panel is directly controlled from the sysboard I/O ports and it
looks like a buggy display element (2 x 4 digits). Check if it is properly
seated or has bad solder spots. Also check if the panel cable is in good
order and properly seated.
Alfred Arnold retorts
Hi Peter, took out my Tek yesterday evening and probed
around a little bit. It doesn't seem to be a problem in the display
element itself, since swapping them doesn't help...the interesting thing
is that during POST, the write signal for the bottom display half is overlayed
with a 250 Hz signal, which however has not full level. So either
the driver chip on the planar has gone bad or there is a short to another
signal. Seems I have to unassemble the whole beast :-/
And finally, the moment of discovery-
By the way, I was able to fix the display yesterday evening.
There was a bad contact in the display module's socket, but one that can
make you tear out your hair...there was no contact to the Vcc pin of the
display, but it still somehow worked because it supplied itself with power
via the
other signal pins (probably via the usual CMOS protective diodes).
You could put a scope on the /CLR pin of the display module and see how
the voltage started to ripple when one digit was turned on. Turn
on a second digit, and the voltage broke down finally and the display resets...
Mod 95 with 8 "Lights" on panel
I have been having some trouble with getting a Mod 95
to see the optical SCSI drive being added. I went in and unplugged
the SCSI cable, and power cable to reset everything and start over.
Now I have 8 positions across the op panel with a pattern of small dots
(LEDs) and the machine goes no farther in the boot process. What
do the 8 position, all LEDs on suggest.
It suggests you pulled one end of the cable going to the
LED display loose at one end or the other or that you somehow damaged the
cable to it. Check for this small flat cable and make sure its OK.
Jack, I had high hopes that it would be that simple. I
checked and re-plugged both cables and did not change my symptom.
Any other ideas. I have an HMM dated Sept 1993. Where did you find
the symptom info.? Did you get it from the HM manual?
From Jack GULLEY
The HMM will not give you details on what's wrong.
The symptoms indicate one of the lines to the operator panel has a hot
or shorted bit. If it is the same bit in each of the 8 display position,
it indicates a common line or driver problem. If the bit come on
as soon a power comes on and
nothing else ever displays, then it very likely the operator panel
is blown. Problem isolation is simple - replace the cable, then the
electronics at each end of the cable, after first making sure everything
was plugged in and the cable not damaged.
Panel Programs
A small program to access the LED is HERE
Bob Eager has these-
DLITEDOS
DOS device driver for HD display on Model 95 LED Panel
PANEL
OS/2 device driver for character display on Model 95 LED Panel
BASIC Way
Peter sez:
If you use this little Basic program you can write anything into the
panel if you substitute A$ with your text:
A$ = "133 MHz "
FOR q = 1 TO 8
OUT (&H107 + q), ASC(MID$(A$, (9 - q), 1))
NEXT q
You can as well use DEBUG's "OUT {portnumber} {value}" command to pipe
into the display. Write a text that includes 8 lines of out-commands to
the ports 108 - 10F with the hex character values for {value} and use DEBUG<mytext.txt
to bring it into the panel.
30 is "0", 39 is "9", 41 = "A" 5A = "Z" ... you will get the scheme.
Linuxinfo
If you have a model 95 (8595, 9595), you can get the source
of linuxinfo, that is linuxinfo.c.
This program shows you the current CPU-load, date, time and the kernel-version
on the 95s' LED display. The information is continuously scrolled from
right to left. This allows system-load-control, even if you are not logged-in
and no monitor is connected to the system (like in central computing rooms).
As the two very right LED-letters are kept blank, it works great together
with the IBM SCSI-Subsystem driver with the command line-parameter ibmmcascsi=display.
Operator
Panel Connector
| PIN |
DESCRIPTION |
PIN |
DESCRIPTION |
| 1 |
-On request |
18 |
Ground |
| 2 |
-Power good |
19 |
Address 1 |
| 3 |
Data 0 |
20 |
Ground |
| 4 |
Hardfile LED |
21 |
-Write LED (high) |
| 5 |
Data 1 |
22 |
Ground |
| 6 |
-Unattended |
23 |
-Write LED (low) |
| 7 |
Data 2 |
24 |
Ground |
| 8 |
Presence Detect 3 |
25 |
+5 V |
| 9 |
Data 3 |
26 |
Data 7 |
| 10 |
Presence Detect 2 |
27 |
+5 V |
| 11 |
Data 4 |
28 |
Ground |
| 12 |
Presence Detect 1 |
29 |
-Remote power-on request |
| 13 |
Data 5 |
30 |
-Read LED (all) |
| 14 |
Presence Detect 0 |
31 |
+5 V |
| 15 |
Data 6 |
32 |
Speaker ground |
| 16 |
Ground |
33 |
Speaker data |
| 17 |
Address 0 |
34 |
Speaker ground |
9595 Main
Page
|